Pine Cone Spider For Kids
Woolly Pine Cone Spiders

Pine Cone Spider For Kids

Woolly Pine Cone Spider

Today we are giving this easy peasy Pine Cone Spider tutorial for creating fun and unique pine cone spiders perfect for craft parties.  These adorably spooky little arachnids are a fun and creative project for your clutter. Every body gets to customize their own design and show off their unique style. Follow the steps and pictures below to learn how to make your very own woolly pine cone spider.  My kiddo just loves counting the legs and eyes for this fun project.  These are fun to make any time of year but we made our pine cone spiders for Halloween!

What you will need

Pine Cone Spider Directions

Build the Spider Legs

First we will make the pine cone spider legs. Start by cutting about one inch off all four of the pipe cleaners. I do this by evening them all up and cutting them all with one cut.  After all four have been cut even them up again and pinch the middle with both hands and twist creating 8 legs all twisted together.  I like to try to twist them all the around each other one full time to ensure they are secure.

Attach Legs to Torso

Now gently begin to work the spider legs into the belly of your pine cone.  Carefully spread the legs out between the pine cone petals as evenly as possible and try to resemble real spider legs.  When complete Yours should look something like the ones in the picture below.  

woollypineconespiderstep2

 Once you have the pine cone spider legs positioned where you want them use the low-temp hot glue gun to glue them in place.   My kiddo went a little crazy here and probably applied way to much glue but its hidden under the belly of the spider and those legs are not falling off any time soon.  

woollypineconespiderstep3

Shape The Spider Legs

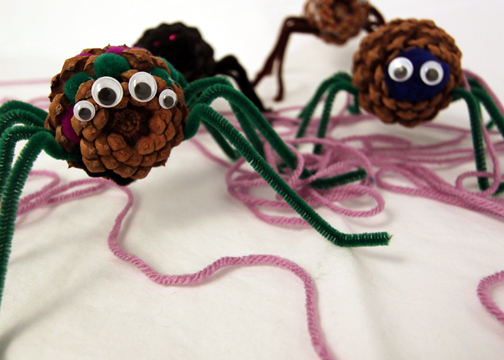
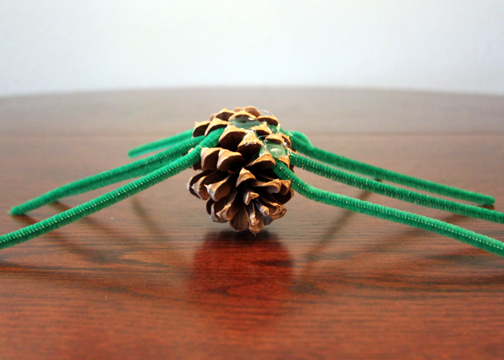
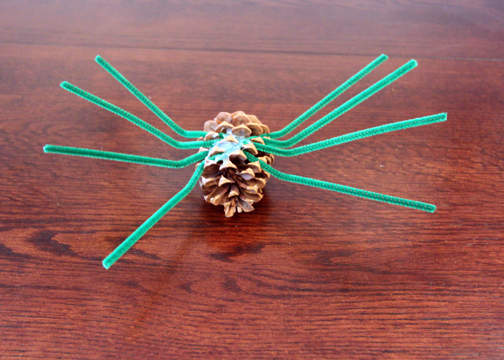
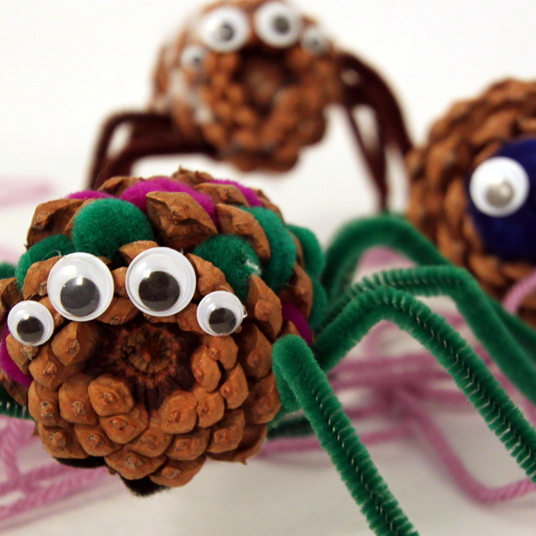
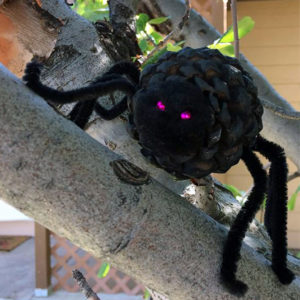
So now its time to shape pine cone spider legs.  First while spider is on its back go ahead and bend the legs back as seen in the picture above.  Then hold your finger along one side of the abdomen and bend the first four legs down, repeat for the other side so it looks something like the picture below.  

woollypineconespiderstep4

Its starting to resemble a real spider!  Now create the second bend for your woolly pine cone spiders feet by grabbing the last inch of each leg and gently bending the tip a little less then 90 degrees  down as seen in the picture below. 

woollypineconespiderstep5

Decorate Pine Cone Spider

Awesome! Now its time for the fun part!  Flip your pine cone spider over and decorate your pine cone spider however you wish. On this pine cone spider we added four googly eyes with our low temp hot glue gun but you can do as many eyes as you like.  We choose to make this one  a woolly pine cone  spider by stuffing purple and green pompoms into all his nooks and crannies. The pompoms stuck very well and we didn’t use any glue for this step. My little worker loved using pieces of cotton balls to stuff her spider. Above all remember to have fun!

woollypineconespiderstep6

The Woolly Pine Cone Spider is complete!

Now get the kids and go create a whole clutter of these arachnids to haunt your house. My kiddo thinks the simple one with the blue pompom for a  head and two eyes is cutest one!  We would love to see what you create, please post a link to pictures of your in the comments below!  If you are looking for another cute Halloween pine cone craft please check out our Pine Cone Bat!

Clutter of Pine Cone Spider

This Post Has One Comment

Comments are closed.